REVIEW · MANALI
Friendship Peak Trek
Book on Viator →Operated by Bikat Adventures Private Limited · Bookable on Viator
If you like big mountains and tight logistics, this fits. The Friendship Peak trek gives you a guided, supported way to chase a summit in the Pir Panjal range without playing guess-the-trail.
I especially like the support structure: you get a guide, cook, helpers, and porters for common supplies, plus a mountaineering-course trek leader with first aid and special rescue training. I also like that the package covers key gear and overnight needs, including tents, sleeping setup, and climbing essentials like snow boots, helmet, gaiters, and an ice-axe.
One consideration: this isn’t a gentle “try trekking” trip. Friendship Peak is at about 17,348 ft, and the trek demands prior high-altitude experience and strong fitness.
In This Review
- Key things I’d watch for before you go
- Friendship Peak Trek in Manali: The Big Picture
- Price and Value: What You’re Really Paying For
- Difficulty Level: Who This Trek Is For (and Who Should Skip It)
- What the “Supported” Setup Actually Means on Trek
- The Route Day by Day: What Each Part Feels Like
- Day 1: Arrive in Manali, settle in
- Day 2: Drive to Solang, trek to Bakarthatch
- Day 3: Bakarthatch to Advance Base Camp
- Day 4: Load ferry to Camp 1, then back to ABC
- Day 5: Acclimatization and moving to Camp 1
- Day 6: Summit attempt, then back to Base Camp
- Day 7: Reserve day
- Day 8: Base Camp to Solang, drive back to Manali
- Gear and Camp Comfort: What You Get, What You Still Need
- Food on Trek: Why It Can Make or Break Altitude Days
- Seasons and Weather: When You’ll Have the Best Shot
- How to Train for Friendship Peak (Without Overthinking It)
- Should You Book Friendship Peak?
- FAQ
- How long is the Friendship Peak trek?
- Where does the trek start and where do you stay in Manali?
- What’s included in the trek package?
- What gear do I need to bring myself?
- Is this trek suitable for beginners?
- What fitness level is required?
- What months are best to go?
Key things I’d watch for before you go
- Altitude isn’t optional here: the summit attempt happens only after acclimatization moves and a plan built for moving higher safely.
- You carry your own bags: porters handle common supplies, but your personal pack is still on you.
- Gear is included, but your fitness is the real requirement: you must meet the run/walk benchmarks and have done similar Himalayan trekking before.
- Food is properly handled: meals are included on trek, and the camp operation is a big part of what makes the schedule work.
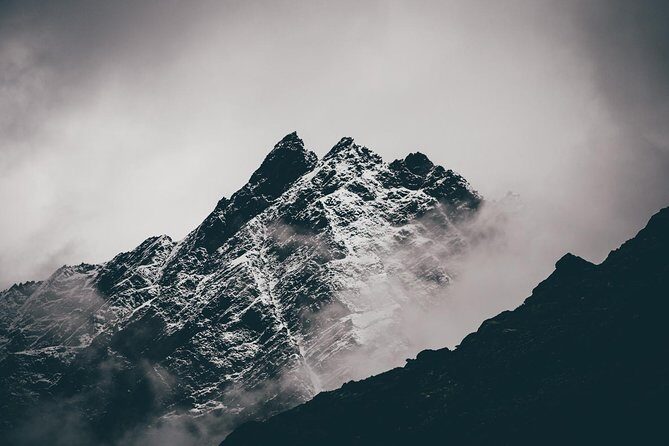
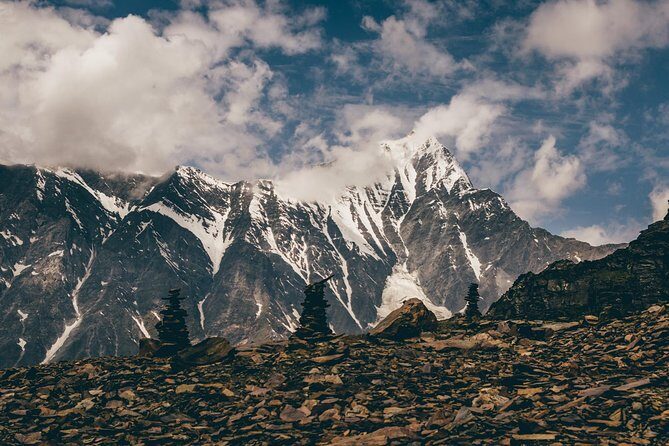
- Views are a major payoff: at the top, you can look across Pir Panjal, Dhauldhar, and the Great Himalayan range, with several named peaks visible on clear days.
- Weather decides the timeline: it’s a good-weather trek, so you need flexibility for conditions in the Himalaya.
Friendship Peak Trek in Manali: The Big Picture
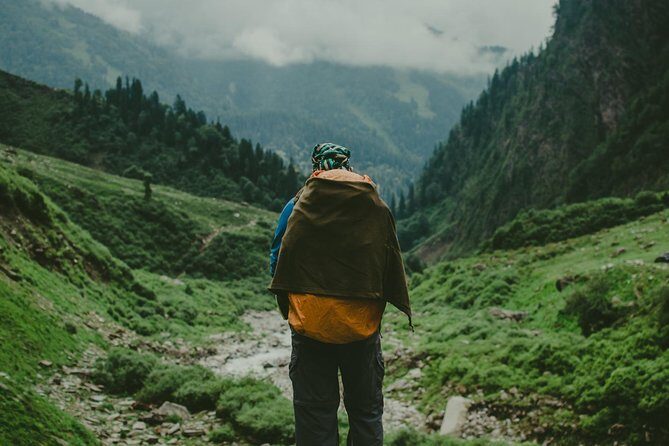
Friendship Peak sits in the Pir Panjal range in Himachal Pradesh, roughly 17,348 ft above sea level. The whole point of doing this trek with a support team is simple: you still work hard, but you’re not responsible for route-finding, camp logistics, rescue gear setup, or meal timing. For experienced trekkers, that trade-off is often worth it.
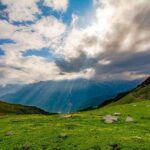
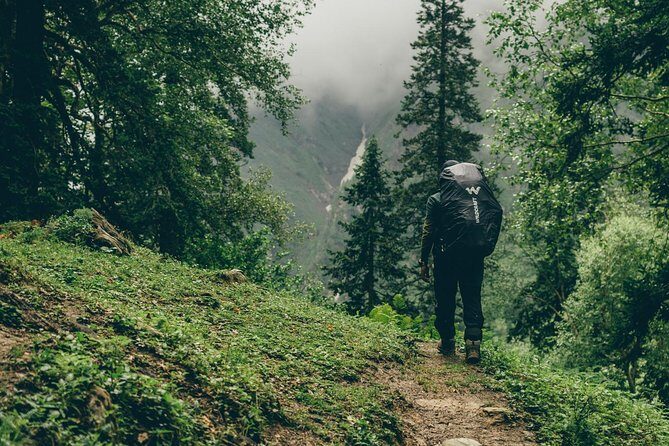
What makes this trek interesting is the mix of terrain and the way the itinerary is paced. You move through alpine meadows and dense forest sections, cross multiple streams, then shift into higher, harsher mountain conditions. The final rewards are broad-sky panoramas: you’re aiming to see the Pir Panjal range, Dhauldhar range, and the Great Himalayan range, plus peaks like Hanuman Tibba, Shitidhar, Indra Asan, and Deo Tibba when visibility is good.
The package is also designed for trekkers who want to avoid unnecessary stress. It’s a private trek, so you’re not dealing with the “mixed pace” chaos that can happen in larger group tours. Still, it’s not a do-anything adventure day. The summit push and acclimatization plan are structured.
You can also read our reviews of more hiking tours in Manali
Price and Value: What You’re Really Paying For
The price is $898.79 per person for an approximate 8-day trek (with two nights of guesthouse accommodation in Manali). That number looks “mid-to-high” until you break down what’s included.
Here’s where the value shows up:
- Manali lodging (Day 1 and Day 8): two nights of guesthouse/hotel accommodation are included.
- Meals throughout the trek window: lunch starts on Day 2 on the trek, and food coverage runs through the last day in Manali.
- Tents and sleeping systems: you get tents on twin sharing basis plus sleeping bags and sleeping mats.
- Safety and technical equipment: the list includes rescue rope, harness, carabiners, pulleys, snow stakes, and dead man/boy gear. That’s not just “nice to have”—it matters on steep, icy sections.
- Mountain-specific gear is provided: snow boots, helmet, gaiters, and ice-axe are included.
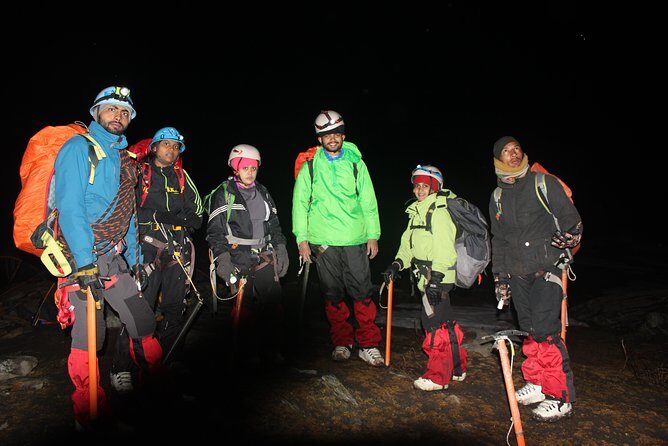
- Trained leadership and support staff: you have an expedition guide and cook and helpers/porters for common supplies, plus a trek leader with mountaineering course certification, first aid, and special rescue training.
What’s not included is also important. You’re responsible for portage of personal bags during the trek, and you’re not getting travel insurance in the package. If you’re planning this trip, budget for insurance separately so you’re not stuck later.
In short: this price is mostly paying for safety systems, camp setup, meals, and leadership—the parts that decide whether an altitude trek feels controlled or chaotic.
Difficulty Level: Who This Trek Is For (and Who Should Skip It)
Friendship Peak summit attempts aren’t for beginners. The trek leader plan includes acclimatization days, technical safety equipment, and a summit day that will likely feel strenuous even if you’re fit.
You should take the requirements seriously:
- You need prior experience of high altitude treks.
- The fitness level required is quite high.
- You should meet the stated benchmarks: jog/run 5 km in 25–30 minutes or walk continuously for 10 km with only a few small breaks on plain terrain (slight incline is better).
- You also need a minimum track record: 2–3 challenging treks plus 20–25 total trekking days in the Himalayas or similar ranges.
If you’re new to altitude trekking, you’ll probably spend a summit day fighting cramps, low energy, and breath issues instead of enjoying the mountain. If you already have high-elevation trekking experience and you train like you mean it, this is a realistic, structured path toward a famous summit.
What the “Supported” Setup Actually Means on Trek
This is a supported trek, which in practice means you’re not alone in the hard parts.
You can expect:
- A certified expedition guide and a cook running camp operations.
- Helpers and porters handling common supplies (not your personal pack).
- Tents on twin sharing basis, with sleeping mats and sleeping bags supplied.
- Safety equipment included for the route’s needs, including static rescue rope, harness, and belay-style tools.
You still have real work. You’ll hike each day, and on summit day you’ll push when the mountain asks you to. But the setup reduces the usual headaches: there’s no hunting for food, no figuring out where gear goes overnight, and no “did we pack enough for tomorrow” panic.
Also, the trek is private for your group. That often means your pace and comfort matter more, and you can communicate needs without feeling like you’re slowing a big crowd.
The Route Day by Day: What Each Part Feels Like
Below is the practical flow of the trek, and what I’d pay attention to at each stage.
Day 1: Arrive in Manali, settle in
You arrive in Manali and overnight in a hotel/guesthouse. This first day is about recovering from travel and getting your gear sorted for cold conditions. Keep your feet fresh. Don’t plan heavy workouts—think “short walks, early sleep.”
This stop matters because it sets you up for better hiking later. Your summit attempt is the goal, but your body needs time to adjust to the trip rhythm.
Day 2: Drive to Solang, trek to Bakarthatch
You drive from Manali to Solang, then start trekking toward Bakarthatch. This is your first real hiking day in the mountains, so it’s a good chance to lock in pacing.
You’ll want to treat this day like a warm-up rather than a victory lap. Early energy spending makes later acclimatization harder. Lunch starts on trek Day 2, so you’ll get fuel on schedule.
Day 3: Bakarthatch to Advance Base Camp
Today is a step deeper into the trekking world. You move from Bakarthatch to Advance Base Camp. Expect the trail to feel more “mountain serious” as you gain elevation.
This is where you should focus on steady breathing and consistent footwork. On high-altitude treks, the hikers who do best aren’t always the strongest—they’re the ones who regulate effort.
Day 4: Load ferry to Camp 1, then back to ABC
This day is structured around Camp 1 logistics and acclimatization. You’ll have a “load ferry” movement to Camp 1 and then you return back to Advance Base Camp.
What that means for you: you’ll likely hike with a plan that includes carrying less than the summit day demands, while the team organizes staging. It’s a smart design because it builds familiarity with higher terrain without exhausting you too early.
Day 5: Acclimatization and moving to Camp 1
This is an acclimatization day where you move to Camp 1. If you’ve done altitude trekking before, you’ll recognize the pattern: you’re teaching your body to handle elevation, not just forcing progress.
Be conservative. Even if you feel okay, don’t use a good moment to race ahead. Your body is learning how to function under thinner air.
Day 6: Summit attempt, then back to Base Camp
This is the main day. You start the summit attempt and return to Base Camp afterward.
You’ll feel the difference between “trek effort” and “summit effort.” Sunrise-time conditions, cold temperatures, and low oxygen can change everything: your legs burn, your breathing gets sharper, and your focus needs to be clear. That’s where the included safety systems and trained leadership matter most.
If you’ve trained for altitude and you pace your start instead of sprinting it, you give yourself the best shot at a successful top.
Day 7: Reserve day
You get a reserve day. This is not wasted time—it’s there for weather and conditions, which is reality in the Himalaya.
If Day 6 becomes a “push hard but don’t make it” situation, Day 7 can become your second chance. If the mountain behaves, you’ll use the day to recover, hydrate, and reset.
Day 8: Base Camp to Solang, drive back to Manali
You hike back to Solang and then drive to Manali. This is often when people want to hurry. Don’t. Your body is tired, and downhill stress can still hurt knees and ankles.
Once you’re back in Manali, you’ll have your last included hotel/guesthouse night. Use it for good food, warm shower time, and early sleep.
Gear and Camp Comfort: What You Get, What You Still Need
The trek includes major technical and cold-weather gear items:
- Tents (twin sharing), sleeping bags, and sleeping mats
- Snow boots
- Helmet
- Gaiters
- Ice-axe
- Safety gear such as rescue rope, harness, carabiners, pulleys, snow stake, and dead man/boy
That’s a huge practical benefit. In many treks, gear costs and rental hassles become a hidden budget sink. Here, the plan covers the key items tied to the summit attempt environment.
Two more notes that matter in real life:
- You’ll sleep in tents at night, so expect basic cold and wind management. Your sleeping bag and mat are part of that solution.
- You carry your own bags. That means your personal pack weight should stay sensible. Don’t over-pack just because the trek provides lots of gear.
Food on Trek: Why It Can Make or Break Altitude Days
Food is included from lunch on Day 2 through the end of the last day in Manali. On an altitude trek, that coverage isn’t a perk—it’s part of safety.
When you’re climbing and you’re cold, you burn more energy and you dehydrate faster. If meals arrive late or are inadequate, people pay for it on summit day.
Based on the strong feedback about food quality and timely snacks, I’d treat the camp kitchen as a real part of the trek’s success. A good meal routine helps you keep your strength for the next push, especially during acclimatization and the summit attempt.
Seasons and Weather: When You’ll Have the Best Shot
The best months for this trek are listed as:
- May to June
- September to October
You should plan around conditions. This is explicitly a trek that requires good weather. If it’s canceled due to poor weather, you’ll be offered a different date or a full refund. That’s the right kind of flexibility for mountain trips.
My practical advice: if your schedule can handle shifting dates, you’ll reduce stress. And if weather turns fast, trust the team’s call-making. On high-altitude routes, waiting calmly can be the smarter move than forcing it.
How to Train for Friendship Peak (Without Overthinking It)
Your baseline fitness requirement is already clear. If you want the summit day to feel less scary, train to meet those standards well before departure.
Use this as a checklist:
- Build stamina with consistent hiking or walking.
- Include short bursts of running or jogging to hit the stated 5 km benchmark.
- Practice carrying a pack on walks so your legs get used to it.
- If you’ve done only one tough trek, do one more training trip before attempting Friendship Peak.
And here’s the mental part: high-altitude treks reward patience. If you start out too fast, you’ll pay later. The trek’s acclimatization pacing is meant to help you regulate effort, but your habits still control the outcome.
Should You Book Friendship Peak?
Book it if:
- You’ve done at least 2–3 challenging Himalayan treks and you’ve already spent 20–25 trekking days in similar ranges.
- You can hit the stated fitness benchmarks.
- You want a private, supported summit attempt with clear safety gear and camp meals handled.
- You’re serious about altitude and you want a structured plan with a reserve day.
Skip it (or choose a lower summit challenge first) if:
- You’re new to high-altitude trekking.
- Your training is more “casual weekend hikes” than measurable fitness.
- You don’t want to carry your own personal pack during the trek.
For the right experienced hiker, Friendship Peak is the kind of itinerary that feels focused: serious mountain time, real support, and a summit view that’s bigger than the effort you put in.
FAQ
How long is the Friendship Peak trek?
The trek is approximately 8 days, with a plan that includes two days in and around Manali and a 6-day trekking/summit window.
Where does the trek start and where do you stay in Manali?
You start in Manali. The package includes hotel/guesthouse stays in Manali on Day 1 and the last day.
What’s included in the trek package?
Included items cover food on the trek (from lunch on Day 2 through the last day in Manali), tents (twin sharing), sleeping bags and sleeping mats, safety equipment, a certified expedition guide and cook with helpers/porters for common supplies, and a trek leader with mountaineering course certification and first aid/special rescue course. Personal mountaineering equipment like snow boots, helmet, gaiters, and ice-axe is also included, along with any applicable permits/camping charges and IMF fees for foreign nationals.
What gear do I need to bring myself?
The package includes personal mountaineering equipment like snow boots, helmet, gaiters, and ice-axe. What’s not included specifically is the portage of personal bags, so you should plan for carrying your own personal pack.
Is this trek suitable for beginners?
No. Friendship Peak is not meant for beginners. You need prior experience with high-altitude treks and strong fitness.
What fitness level is required?
You should be able to jog/run 5 km in 25–30 minutes or walk continuously for 10 km (with 3–4 small breaks) on plain terrain with slight incline preferred.
What months are best to go?
The best months listed are May to June and September to October. The trek also requires good weather, and if it’s canceled due to poor weather you’ll be offered a different date or a full refund.